Brianna Munson-Perez
Digital Media 2
Photoshop Pumpkin

Conclusion Questions:
1.In as much detail as possible record the steps it took to complete this project. Start with setting up your layers in photoshop and use your photoshop vocabulary to explain how you added a face on to the pumpkin to create a unique jack-o-lantern.
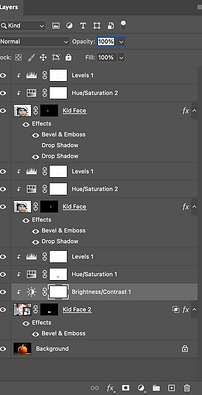
- To start this project I had to set up the document. So to do this I had to download the initial pumpkin picture and open it in Photoshop. Now that I had my pumpkin background I went to file> place embedded and selected the photos I want to use as the facial features of this jack o lantern. I made sure to enlarge it and press the checkmark. I then used the elliptical marquee tool to cut out the facial features of the face pictures. Using the paintbrush tool and making sure I was on the layer mask I was able to conceal the rest of the area I didn't want. I used a sharper brush to make it seem like it's carved out of the pumpkin. I also added in other adjustments, to do this I went up to layer> New Adjustment> Hue/Saturation and tweaked it as needed to create a colorized orange hue to the features. I did the same with brightness under layer> New Adjustment> Brightness/Contrast. The last thing I added was the effects of Bevel and Emboss while also adding a drop shadow to create more depth and color variance to the pumpkins features.
2. Based on your understanding of photoshop and the learning target, what level of mastery does your project demonstrate (Exceeds, Meets, Needs Work, minimal understanding).
- I believe I exceeded mastery on this project because I added in multiple effects and adjustments to the facial features of this jack o lantern. I used two different faces to create this customized expression. I also made sure that the features were neatly cut out using a clipping mask.